(or How I learned to love Arduino projects)
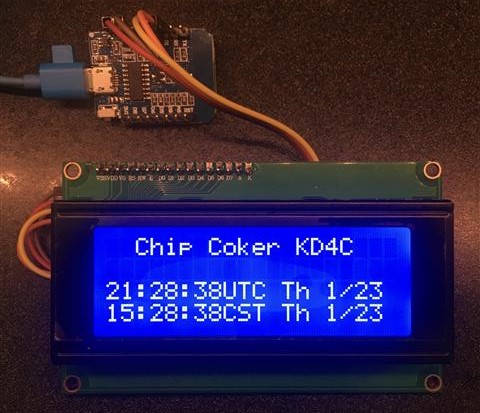
Recently, several of us in the Richardson Wireless Klub completed a small project session led by Brady Pamplin W5LH and Mike Jahrig KG5P to create a very inexpensive Wi-Fi-connected clock based on easy-to-use (and to learn) Arduino microcontroller and a multiline LCD display (see Figure 1). For someone that has had no experience with these types of components, I was intrigued and wanted to learn what these types of components are good for and how easy or hard it would be. I was very pleasantly surprised!
What’s an Arduino?
The Arduino is a small single-board microcontroller (processor and basic interfaces). There are several versions but all are easy to use and have become very popular with hobbyists and in educational uses. The project started in Italy (“Arduino” was the name of the bar where the team met) to create low-cost and easy-to-use devices that can easily interact with the environment using sensors and actuators. A very large number of types of devices are now available and are being used in a huge number of very creative ways. You can find several types of devices in the hobbyist section at places like MicroCenter, but your best bet is obtaining parts on eBay directly from China, where they are much cheaper but take awhile to arrive.
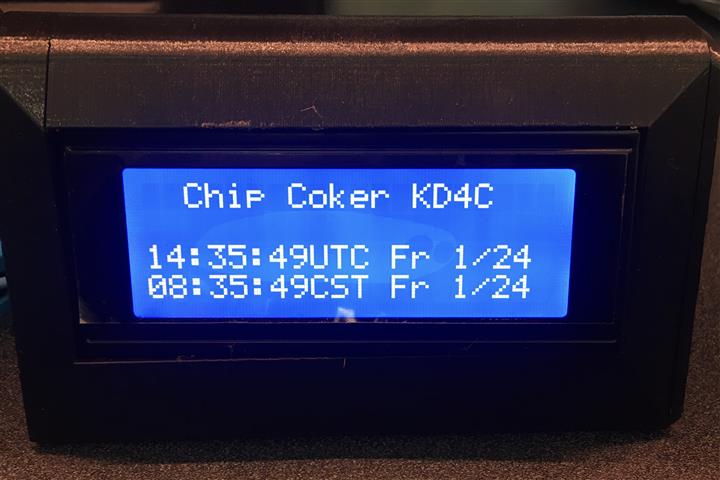
The basic parts that we used for the clock were a WeMos D1 Mini (around $3.50) and a 4 row x 20 character LCD display (around $7). Brady even whipped up some 3D printed cases. The microcontroller is powered by a micro-USB port (think phone charger) and in addition to the built-in input/output interfaces, has built-in Wi-Fi, so it’s very easy to build things without having to figure out the basics.
For our clock, the hook-up is literally 4 wires between the two components: Power (5VDC) from the controller board to the LCD display, and a serial interface (data/clock) to the display’s interface module. Even if you didn’t want to dive into how all this works, you could easily build one. But you would be missing most of the fun.
It’s important to note the difference between the Arduino and a Raspberry Pi. Although easy to confuse, they are actually quite different. The Pi is a very small computer – it has an operating system, common human interfaces like a keyboard and display, and it can do lots of things at the same time. The Arduino, however, being a microcontroller, is designed to do only one thing at a time, and does it repetitively until instructed otherwise.
The Magic Is In the Code
The Arduino is programmed in a Python-esque language that hides the C++ that lies below. Have I scared you off yet? Don’t be. It’s actually very easy to pick up. I’ve done a fair amount of coding but it’s mostly been web and data applications, where most of the low-level stuff (like writing to the screen) was done for you, which leaves you to focus on the logic. This is actually very similar. There is an Integrated Development Environment (IDE) for the controller which runs on your PC and is where you create, compile and load the code that the controller executes. You plug the controller into your PC with a USB cable, and the USB supplies power to the controller. There are lots of libraries available that do most of the heavy lifting (the internet is your friend for all kinds of examples), and you are left to stitch them all together in a “sketch” to do what you want.
Our class started by assembling the hardware (again, easy) and then loading a very basic routine that setup the controller’s Wi-Fi and then went to the internet for the time (using the NTP pools) then just wrote that to the display. This approach leaves a lot to be desired, and several people in the class noted the problems almost immediately: Too much load on the NTP servers. No connection, no time. No provision for daylight saving time. Several of us left to immediately do what we hams do – tinker, poke around, and see what we can improve! I found a better time library that was a much better fit for what we were trying to build, and after a couple of different late night software iterations, the group now has a clock that sets the time once, calculates local time for your time zone, corrects for daylight saving time, and synchronizes once per day to the internet to keep your time accurate – all for the cost of a decent lunch. And in the process, I learned a bunch about microcontrollers, how to code them, and how to hook things up to them. I now have a small but growing list of things that I would like to play around with, and requests are coming in on additional things that could be added to the clock project (like a battery-backed real-time clock circuit that would maintain time even if powered off or not connected to the internet – I’ve already got the $1.50 part on order from China…). Brady is already looking for other fun things to do in conjunction with RWK and/or the Dallas Makerspace where he teaches.
If all you want is a clock, then go buy a clock. But if you want to learn and have a bit of fun and end up with a pretty cool “look, I made that” clock, then this might be the project for you too!
(this article was written for the Feb 2020 issue of the Richardson Wireless Klub newsletter, The Chawed Rag)